Cinematic Wedding Film Editing Workflow: A Pro Guide
- 3 days ago
- 8 min read

A cinematic wedding film editing workflow is a structured series of coordinated steps that transforms raw footage into an emotionally compelling, visually consistent highlight film. The process moves through five defined phases: project organization, story assembly, color finishing, audio mixing, and final delivery. Cinematic editing is defined more by story structure and rhythmic pacing than by flashy effects. Ataviaweddings, with over 16 years of experience across more than 1,600 weddings, applies exactly this kind of disciplined, phase-based approach to every film they produce.
What does a cinematic wedding film editing workflow involve?
A practical cinematic wedding film editing workflow starts with narrative assembly, then moves through finishing passes for color and audio before final export. Each phase has a clear purpose and a defined output. Skipping phases or working out of order creates compounding problems: color graded before correction produces inconsistent skin tones, and audio mixed before dialogue is cleaned produces muddy ceremony sound.
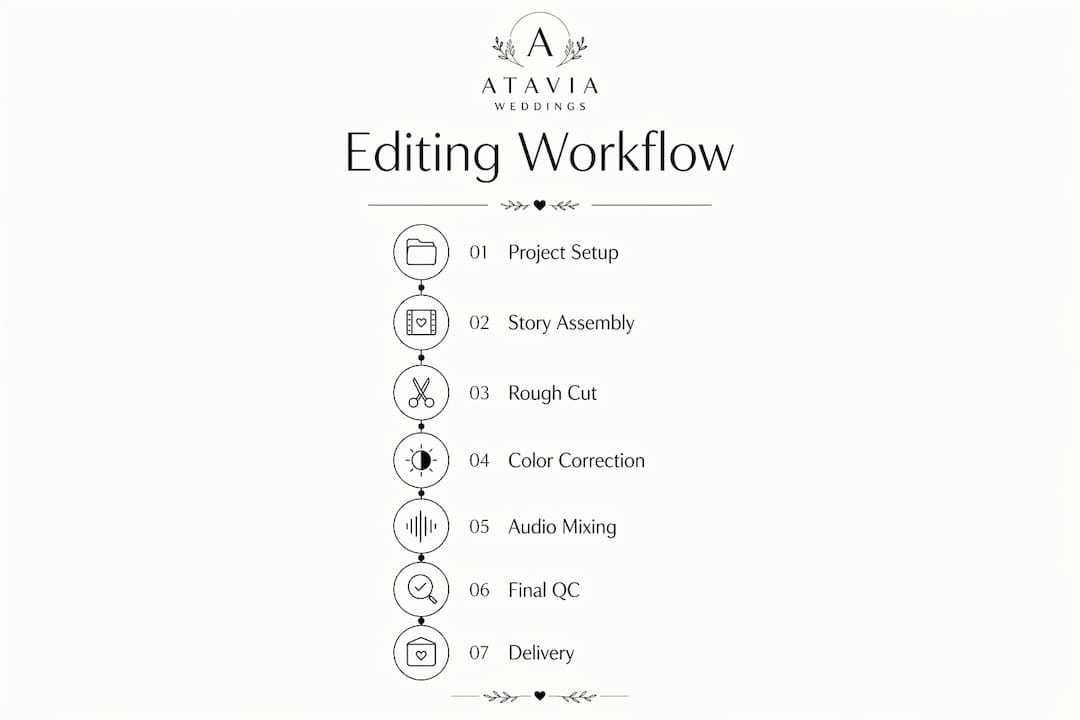
The five phases map directly to creative decisions. Story assembly answers what the film is about. Color correction and grading answer how it looks. Audio mixing answers how it sounds. Quality control answers whether it is ready. Delivery answers how the client receives it. Every professional wedding film production workflow follows some version of this sequence.
How to set up and organize your project for efficient editing
Project setup is the phase most editors rush and most regret. A well-organized project folder structure, consistent naming conventions, and correct sequence settings save hours during every subsequent phase.
Essential project setup steps
Create a master project folder with subfolders for raw footage, audio, graphics, exports, and project files.
Name clips using a consistent convention: camera angle, date, and scene (e.g., CAM1_ceremony, CAM2_reception).
Set your sequence to match your primary camera’s format before importing any footage.
Import all media before building any sequences to avoid broken links later.
Create a dedicated multicam source sequence for ceremony and reception coverage.
Premiere Pro supports multicam source sequences with sequence presets set to “Automatic” based on Camera 1’s format. That setting alone eliminates one of the most common setup errors: mismatched frame rates between the sequence and the primary camera.
Pro Tip: Enable “audio follows video” in Premiere Pro’s multicam settings. This maps multi-mono source audio into a single adaptive track, so audio stays synced when you switch camera angles without manual realignment.
Tool or setting | Purpose |
Sequence preset: Automatic | Matches sequence to Camera 1 format |
Audio follows video | Keeps audio synced during multicam angle switches |
Multi-mono audio mapping | Routes lavalier and camera audio into one adaptive track |
Labeled bins by scene | Speeds clip location during assembly |
Proxy workflow | Reduces playback lag on high-resolution footage |
What are the key steps to build the story and assemble a rough cut?
Story assembly is where the film gets its emotional spine. The goal at this stage is not a polished cut. The goal is a working structure that communicates the arc of the day.
Building the narrative structure
Start by selecting your anchor moments: the vows, the first kiss, the first dance, and any speech highlights. These are your structural pillars. Everything else fills the space between them. A 3-act structure works well for highlight films: the anticipation and preparation, the ceremony, and the celebration. A 5-act structure adds the couple’s arrival and the reception send-off as distinct beats.
Music selection happens before you cut a single clip. The music defines the pacing, the emotional tone, and the length of the film. Choose a track first, then build the edit around it.
Cutting to music: the core technique
Cutting visuals to beats, matching shot length to tempo, and using rhythmic pauses for emotional impact are the defining techniques of cinematic wedding editing. This is not about cutting on every beat. It is about understanding the phrase structure of the music and aligning your story moments to those phrases.
Cut on the downbeat for high-energy moments like the first dance entrance.
Hold a shot through a musical phrase to let an emotional moment breathe.
Use speed ramps and time remapping tied to musical anchors to create cinematic motion.
Place the vow exchange at the emotional peak of the music, not just anywhere in the middle.
Use slow motion clips at moments of stillness in the music to amplify intimacy.
The rough cut does not need transitions or color work. It needs a clear beginning, middle, and end. Once the story holds up without any finishing, the film is ready for the refinement phase.
How to refine the edit with color correction and grading
Color work follows a strict order: correction first, grading second. Skipping correction and going straight to a creative grade is the most common technical mistake in wedding film production.
Correction before grading
Primary correction fixes exposure, white balance, and contrast to bring every clip to a neutral, accurate baseline. Starting with exposure and white balance before applying any creative look prevents inconsistent skin tones and reduces the number of corrections needed later. A clip that looks natural before grading will hold a grade cleanly. A clip that is over or underexposed before grading will fight the grade at every adjustment.
Use scopes (waveform, vectorscope, parade) rather than your monitor to judge exposure.
Match white balance across cameras before building any look.
Correct skin tones to a neutral baseline before adding warmth or coolness.
Apply grades using adjustment layers so the underlying correction stays intact.
Pro Tip: In DaVinci Resolve, use the Color Match feature to match a log-shot clip to a reference frame from your primary camera. It handles cross-camera color matching in seconds and gives you a clean starting point for the creative grade.
The creative grade sets the mood. Subtle warmth in the highlights and a slight lift in the shadows creates the soft, film-like quality most clients associate with cinematic wedding films. Avoid heavy LUT application without correction underneath. A LUT applied to an uncorrected clip produces unpredictable results, especially in mixed-light reception footage.
What techniques enhance audio mixing and cinematic sound design?
Audio is the half of the film most editors underinvest in. Poor audio mixing breaks the cinematic impression even when the visuals are excellent.
Syncing and cleaning dialogue
The ceremony audio typically comes from three sources: a lavalier on the officiant or groom, a camera-mounted microphone, and sometimes a mixer feed from the venue’s sound system. Sync all three tracks before making any cuts. Use the lavalier as your primary source for dialogue clarity, and use the camera audio as a backup for room tone and ambient sound.
Clean dialogue by removing low-frequency rumble with a high-pass filter set around 80 Hz.
Use noise reduction tools to reduce HVAC hum and crowd noise between spoken lines.
Automate music levels to duck under dialogue and rise during b-roll sequences.
Balance ambient audio from the reception to create a sense of space without competing with the music.
Loudness and sync checks are formal quality control gates, not afterthoughts. Cinematic wedding films delivered to clients should target a consistent loudness level measured in LUFS to meet platform playback standards. A film that peaks too high will distort on phone speakers. A film that is too quiet will feel flat on a TV.
Sound design adds the layer most wedding films skip entirely. A subtle room tone bed under the ceremony, the ambient sound of clinking glasses during the reception, and the natural sound of the couple laughing during portraits all add texture that makes the film feel real rather than produced.
How to finalize your wedding video and deliver it to clients
The finalization phase covers quality control, export settings, and client delivery. This is where technical discipline pays off.
Review the full film at export resolution with headphones for audio sync and level issues.
Check for color inconsistencies between scenes, particularly in mixed-light reception footage.
Verify loudness levels meet your target LUFS before export.
Export a master file at the highest quality your delivery platform supports, then create compressed web versions from the master.
Deliver via a private link with a clear revision policy and deadline stated upfront.
“Treating loudness and sync checks as formal deliverable gates ensures cinematic integrity and prevents late-stage surprises.” — Elevify Wedding Video Editing Course
Turnaround for a standard wedding highlight film, including color correction and revisions, runs around 7 business days for outsourced editing projects. Set that expectation with clients at booking, not at delivery. AI-assisted tools like Plotline AI can generate a structured story script from audio transcripts and timeline metadata in roughly 45–60 seconds, which cuts initial assembly time significantly on complex multi-hour weddings.
Key takeaways
A cinematic wedding film editing workflow succeeds when each phase, from story assembly through quality control, is treated as a distinct, non-negotiable step rather than a suggestion.
Point | Details |
Phase-based workflow | Work through story, color, audio, and QC as separate passes to avoid compounding errors. |
Multicam audio setup | Use Premiere Pro’s “audio follows video” to eliminate manual re-syncing after angle switches. |
Correction before grading | Fix exposure and white balance first; apply creative grades only to corrected clips. |
Music-driven cutting | Select music before editing and align story moments to musical phrases, not just individual beats. |
QC as a delivery gate | Check loudness in LUFS and audio sync before every export, not as an optional final step. |
What I’ve learned after editing over 1,600 wedding films
The biggest efficiency gain in wedding film editing does not come from faster hardware or better presets. It comes from committing to the pass-based approach and refusing to skip ahead. Editors who color grade before their story is locked waste time re-grading clips that get cut. Editors who mix audio before dialogue is cleaned spend twice as long fixing problems that compound.
Building edits in passes aligned to story, audio, color, and polish keeps revisions manageable. When a client asks for a change, you know exactly which pass to revisit. That clarity reduces revision cycles and protects your creative decisions.
The other thing most guides skip: pacing is not about cutting fast. The most emotionally powerful moments in a wedding film are often the ones where you hold a shot longer than feels comfortable. A three-second hold on the groom’s face during the vows communicates more than three quick cuts ever will. Trust the moment. The music and the emotion do the work. Your job is to get out of the way.
— Atavia
Cinematic wedding films by Ataviaweddings
Ataviaweddings has spent over 16 years refining the exact workflow described in this guide, across more than 1,600 weddings. Every film they produce goes through the same disciplined phases: organized project setup, music-driven story assembly, correction-first color grading, and professional audio finishing.
Their wedding film portfolio shows what a fully realized cinematic workflow produces at the highest level. If you want to see how story structure, rhythmic cutting, and color consistency work together in a finished film, the portfolio is the clearest reference available. Couples and filmmakers looking for a production team with a proven process can review service packages built to cover every stage of wedding film production, from capture through delivery.
FAQ
What is a cinematic wedding film editing workflow?
A cinematic wedding film editing workflow is a structured, phase-based process that moves from project organization through story assembly, color correction, audio mixing, and final delivery. Each phase has a defined output before the next phase begins.
How long does it take to edit a wedding film?
Standard turnaround for a wedding highlight film, including color correction and revisions, runs around 7 business days for professional editing projects. Complex multi-camera films may take longer depending on footage volume.
What is the correct order for color work in wedding editing?
Correction always comes before grading. Exposure and white balance correction bring clips to a neutral baseline first, and the creative grade is applied on top of that corrected foundation.
How do you cut a wedding film to music?
Select the music track before making any cuts, then align story moments to the phrase structure of the music rather than cutting on every beat. Speed ramps and slow motion tied to musical anchors add cinematic motion and emotional rhythm.
What loudness level should a wedding film be exported at?
Wedding films should target a consistent loudness level measured in LUFS to meet platform playback standards. Loudness and sync checks should be treated as formal delivery gates, completed before every export.
Recommended
Comments